实体
实体是场景中的对象,具有名称、位置、旋转、缩放、父实体和任意数量的子实体,并通过附加的组件获得能力。本页按实体的生命周期介绍创建、命名和标签、禁用和启用、销毁及复制。
创建实体
实体被加入场景实体树后,才成为场景的一部分;树的根为 app.root。加入之前,实体不会被绘制,脚本不会运行,物理刚体(如果有)也不参与模拟。每个实体都可以成为其他实体的父节点,因此新实体可以添加到 app.root 或场景中的任意实体下。
- 引擎
- 编辑器
- React
- Web Components
const player = new pc.Entity('player');
app.root.addChild(player);

// a child of the player
const hat = new pc.Entity('hat');
player.addChild(hat);
在脚本中,根节点为 this.app.root,this.entity 是脚本附加的实体。
点击层级面板顶部的 +,或右键点击实体并选择 New Entity。菜单提供空 Entity,以及 3D › Box、Light › Spot Light 等已经带有对应组件的实体。新实体会成为所选实体的子实体,因此请先选择父实体。按 Ctrl+E(Mac 上为 Cmd+E)可跳过菜单直接添加空实体。
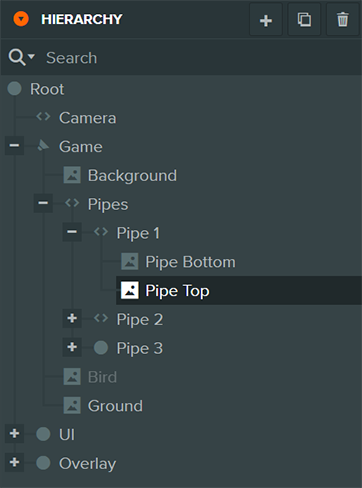
要在应用运行时创建实体,可以从脚本调用引擎 API。
import { Entity } from '@playcanvas/react';

<Entity name="player">
  <Entity name="hat" />
</Entity>
渲染 <Entity> 会创建引擎实体,并将它添加到最近的外层 <Entity> 对应的实体下;若位于 <Application> 顶层,则添加到 app.root 下。
<pc-scene>
    <pc-entity name="player">
        <pc-entity name="hat"></pc-entity>
    </pc-entity>
</pc-scene>
每个 <pc-entity> 都会创建引擎实体,并添加到外层 <pc-entity> 对应的实体下;直接位于 <pc-scene> 中时,则添加到 app.root。运行时追加的 <pc-entity> 会在加入文档后立即创建实体:
const hat = document.createElement('pc-entity');
hat.setAttribute('name', 'hat');
document.querySelector('pc-entity[name="player"]').appendChild(hat);
名称与标签
名称便于识别实体,会显示在编辑器层级面板中,也可用于查找实体。名称不必唯一;未指定名称的实体默认叫作 Untitled。
标签用于标记实体分组。一个实体可以有任意数量的标签,多个实体也可以共享标签。例如,为所有敌人添加 enemy 标签,就能一次查找全部敌人。参见查找实体。
- 引擎
- 编辑器
- React
- Web Components
const enemy = new pc.Entity('goblin');
enemy.tags.add('enemy', 'melee');

enemy.name = 'goblin chief';
enemy.tags.remove('melee');
console.log(enemy.tags.list()); // ['enemy']
在检查器顶部设置实体的 Name 和 Tags。也可以选中实体后按 F2,或在层级面板中双击名称进行重命名。
<Entity> 接受 name 属性。可以通过 ref 访问引擎实体并添加标签:
import { useEffect, useRef } from 'react';
import { Entity } from '@playcanvas/react';

function Goblin() {
  const ref = useRef(null);

  useEffect(() => {
    ref.current.tags.add('enemy', 'melee');
  }, []);

  return <Entity ref={ref} name="goblin" />;
}
<pc-entity name="goblin" tags="enemy, melee"></pc-entity>
tags 特性使用逗号分隔的列表。
启用与禁用
禁用实体时,它和层级中的所有后代都会关闭。组件停止工作:实体不再绘制,脚本的 update 不再调用,物理刚体退出模拟。但各项设置会保留,重新启用时可恢复原状。对于菜单等以后还要使用的对象,应禁用而非销毁后重新创建。
实体的 enabled 属性表示实际是否启用,因此只要任意祖先被禁用,或实体尚未加入场景,读取结果就是 false。在禁用的父实体下将 enabled 设为 true,这个设置会被记住,并在父实体重新启用后生效。
- 引擎
- 编辑器
- React
- Web Components
door.enabled = false; // the door and all of its children switch off
door.enabled = true;  // and back on
取消 Inspector 顶部的 Enabled,或在层级面板中右键点击实体并选择 Disable,即可禁用。禁用实体在层级面板中显示为灰色。运行时可以从脚本设置 this.entity.enabled。
同一菜单中的 Hide 不同:它仅在当前会话中隐藏你自己的视口里的实体,不改变场景或已启动的应用。
<Entity> 没有 enabled 属性。停止渲染会移除并销毁实体,再次渲染会创建新实体。如果希望关闭实体但保留当前状态,应通过 ref 设置引擎实体的 enabled:
import { useEffect, useRef } from 'react';
import { Entity } from '@playcanvas/react';
import { Render } from '@playcanvas/react/components';

function Door({ open }) {
  const ref = useRef(null);

  useEffect(() => {
    ref.current.enabled = !open;
  }, [open]);

  return (
    <Entity ref={ref} name="door">
      <Render type="box" />
    </Entity>
  );
}
<pc-entity name="door" enabled="false">
    <pc-render type="box"></pc-render>
</pc-entity>
运行时可使用 door.setAttribute('enabled', 'true'),或元素的 enabled 属性修改。该属性反映元素自身设置,因此即使父实体被禁用,也可能读到 true。
销毁实体
销毁实体会将其从父节点移除,删除所有组件,并一并销毁所有后代。各实体销毁时会触发 destroy 事件,最深层的后代最先触发。已销毁实体不能再次使用,应释放持有的所有引用。
使用 removeChild() 将实体从父节点移除并不等于销毁,也不会禁用实体。脱离层级的实体不再绘制,但脚本仍会运行,灯光仍会照亮场景。要让实体停止工作,应禁用它;要彻底移除,应销毁它。
- 引擎
- 编辑器
- React
- Web Components
enemy.once('destroy', () => {
    console.log('enemy destroyed');
});
enemy.destroy();
选中实体后按 Delete、点击层级面板顶部的删除按钮,或右键选择 Delete。运行时从脚本调用实体的 destroy(),例如 this.entity.destroy()。
停止渲染 <Entity> 即可。组件卸载时,对应引擎实体及其内部全部内容会被销毁:
{alive && (
  <Entity name="enemy">
    <Render type="sphere" />
  </Entity>
)}
移除元素时,其实体及内部所有 <pc-entity> 对应的实体都会被销毁:
document.querySelector('pc-entity[name="enemy"]').remove();
复制实体
clone() 会深度复制实体,包括名称、标签、变换、启用状态、组件及其设置,以及所有后代。副本需要添加后才进入场景。复制树内部的实体引用会更新为指向副本,因此按钮引用的图像实体等对象会属于副本自身。
副本中的脚本是新实例,在副本加入场景时初始化。每个脚本从原脚本创建时的属性值开始,例如编辑器中设置的值,而非原脚本字段的当前值。
对于树木、拾取物和敌人等重复放置的对象,编辑器提供模板:将实体树保存为资源,既可放入场景,也可在运行时创建。
- 引擎
- 编辑器
- React
- Web Components
const copy = enemy.clone();
copy.setPosition(5, 0, 0);
app.root.addChild(copy);
副本只能获得已在应用中注册的脚本。通过 entity.script.create(MyScript) 按类附加的脚本不会自动注册,因此必须先注册,否则副本中不会包含该脚本实例:
app.scripts.add(MyScript);
要复制场景实体,选中后按 Ctrl+D(Mac 上为 Cmd+D),或右键选择 Duplicate。各副本会放在对应原实体旁边。
运行时,可以对场景实体调用 clone(),或创建模板资源的实例。模板必须先加载才能实例化,因此应将资源标记为预加载,或先加载它:
import { Asset, Script } from 'playcanvas';

export class Spawner extends Script {
    static scriptName = 'spawner';

    /**
     * The template to spawn.
     *
     * @attribute
     * @type {Asset}
     * @resource template
     */
    template;

    spawn() {
        const instance = this.template.resource.instantiate();
        instance.setPosition(0, 2, 0);
        this.app.root.addChild(instance);
    }
}
不需要复制实体,直接再次渲染同一个组件即可。若要为每条数据创建实体,可以遍历数据,并为各个 <Entity> 提供稳定的 key:
{enemies.map(enemy => (
  <Entity key={enemy.id} name="enemy" position={enemy.position}>
    <Render type="sphere" />
  </Entity>
))}
复制元素即可。克隆 <pc-entity> 元素复制的是标记,因此副本根据特性和子标签创建,而非复制原实体的当前状态:
const enemy = document.querySelector('pc-entity[name="enemy"]');
const copy = enemy.cloneNode(true);
copy.setAttribute('position', '5 0 0');
enemy.parentElement.appendChild(copy);
要声明一次子树并生成多个副本,可将其放入原生 <template> 元素。参见通过模板复用场景。
示例
下面的引擎应用使用本页介绍的所有功能。它创建一个带脚本的立方体,脚本将立方体向上抛出,并在其落出视野后销毁;该立方体不加入场景,作为模板保留。应用每帧向 fountain 实体添加模板副本。点击画布会禁用喷泉,所有立方体消失并冻结,因为禁用实体会同时关闭后代;再次点击,它们会从原位置继续运动。
import * as pc from 'playcanvas';

// create the application with the component systems it uses
const canvas = document.getElementById('application');
const device = await pc.createGraphicsDevice(canvas, {
    deviceTypes: [pc.DEVICETYPE_WEBGPU]
});
device.maxPixelRatio = Math.min(window.devicePixelRatio, 2);

const options = new pc.AppOptions();
options.graphicsDevice = device;
options.componentSystems = [
    pc.RenderComponentSystem,
    pc.CameraComponentSystem,
    pc.LightComponentSystem,
    pc.ScriptComponentSystem
];

const app = new pc.AppBase(canvas);
app.init(options);
app.setCanvasFillMode(pc.FILLMODE_FILL_WINDOW);
app.setCanvasResolution(pc.RESOLUTION_AUTO);
window.addEventListener('resize', () => app.resizeCanvas());
app.start();

app.scene.ambientLight = new pc.Color(0.3, 0.3, 0.35);

const camera = new pc.Entity('camera');
camera.addComponent('camera', {
    clearColor: new pc.Color(0.11, 0.12, 0.17)
});
camera.setPosition(0, 3, 14);
camera.lookAt(0, 3, 0);
app.root.addChild(camera);

const light = new pc.Entity('light');
light.addComponent('light');
light.setEulerAngles(45, 30, 0);
app.root.addChild(light);

// three materials for the cubes to pick from
const materials = [
    new pc.Color(1, 0.55, 0.2),
    new pc.Color(0.4, 0.2, 1),
    new pc.Color(0.2, 0.8, 0.6)
].map((color) => {
    const material = new pc.StandardMaterial();
    material.diffuse = color;
    material.update();
    return material;
});

// a script that throws its entity up, and destroys it once it falls out of view
class Fall extends pc.Script {
    static scriptName = 'fall';

    velocity = new pc.Vec3();

    initialize() {
        this.velocity.set(pc.math.random(-2, 2), pc.math.random(8, 11), pc.math.random(-2, 2));
        this.entity.render.material = materials[Math.floor(Math.random() * materials.length)];
    }

    update(dt) {
        this.velocity.y -= 9.8 * dt;
        this.entity.translate(this.velocity.x * dt, this.velocity.y * dt, this.velocity.z * dt);
        this.entity.rotateLocal(120 * dt, 80 * dt, 0);
        if (this.entity.getPosition().y < -4) {
            this.entity.destroy();
        }
    }
}

// clone() can only copy scripts that are registered with the application
app.scripts.add(Fall);

// the template is never added to the scene, so it is never drawn and its script never runs
const template = new pc.Entity('cube');
template.addComponent('render', { type: 'box' });
template.addComponent('script');
template.script.create(Fall);
template.setLocalScale(0.3, 0.3, 0.3);

// the fountain holds every cube, so disabling it disables them all
const fountain = new pc.Entity('fountain');
app.root.addChild(fountain);

const label = document.createElement('div');
label.style.cssText = 'position: absolute; left: 12px; bottom: 10px; color: #ccc; font: 14px sans-serif;';
document.body.appendChild(label);

// every frame, while the fountain is enabled, add copies of the template to it
let timer = 0;
app.on('update', (dt) => {
    if (fountain.enabled) {
        timer += dt;
        while (timer > 0.05) {
            timer -= 0.05;
            fountain.addChild(template.clone());
        }
    }
    label.textContent = `Cubes: ${fountain.children.length}. Click to ${fountain.enabled ? 'disable' : 'enable'} the fountain.`;
});

// disable and enable the fountain, and with it every cube
canvas.addEventListener('click', () => {
    fountain.enabled = !fountain.enabled;
});
可以尝试:
- 降低两处
0.05,让喷泉生成立方体的速度更快。 - 调用
fountain.setLocalScale(2, 2, 2)放大喷泉。立方体是它的子实体,因此绘制尺寸变为两倍,但仍沿相同路径运动,因为translate()在世界空间中移动实体。 - 删除
app.scripts.add(Fall)。副本将不带脚本,因此堆积在中央,不上色,也不会被销毁。