组件
组件为实体赋予一种能力。带相机组件的实体渲染场景,带灯光组件的实体提供光照,带刚体和碰撞组件的实体则会下落、反弹和碰撞。组件通过属性保存功能设置,每个实体同类型组件最多只能有一个。
内置组件
各名称链接到相应开发方式的组件参考。引擎名称既是传给 addComponent() 的名称,也是实体上保存组件的属性,例如 entity.camera、entity.rigidbody。
React 和 Web Components 封装了大多数应用常用的组件。短横线表示没有封装,但仍可通过代码向引擎实体添加该组件,见下文。
添加组件
为实体添加组件时,可以指定初始设置;未指定的设置使用默认值。
- 引擎
- 编辑器
- React
- Web Components
const lamp = new pc.Entity('lamp');
lamp.addComponent('light', {
    type: 'omni',
    color: new pc.Color(1, 0.8, 0.6),
    range: 10
});
app.root.addChild(lamp);
addComponent() 返回新组件,也可以通过 lamp.light 访问它。如果实体已经有灯光,方法返回 null,调试版引擎会记录警告。如果应用尚未注册灯光组件系统,也会返回 null,参见组件系统。
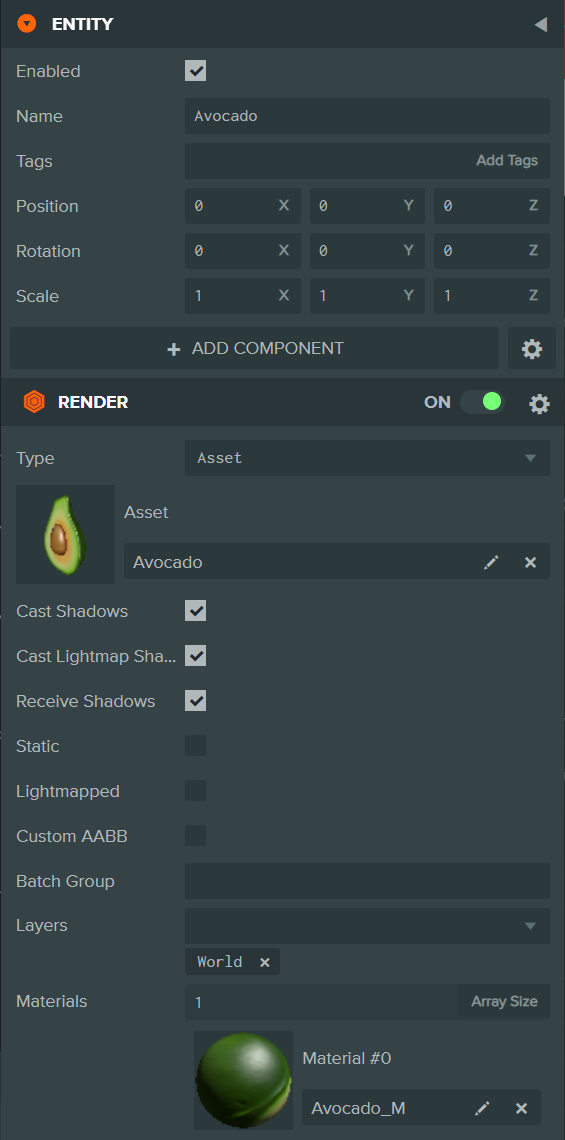
选中实体,在 Inspector 中点击 Add Component,或在层级面板中右键点击实体并选择 Add Component。菜单按用途组织组件,并将实体已经具有的组件显示为灰色。新组件会以面板形式出现在 Inspector 中,属性使用默认值。
将组件放入 <Entity>,通过 props 设置参数:
import { Entity } from '@playcanvas/react';
import { Light } from '@playcanvas/react/components';

<Entity name="lamp">
  <Light type="omni" color="#ffcc99" range={10} />
</Entity>
将组件标签放入 <pc-entity>,通过特性设置参数:
<pc-entity name="lamp">
    <pc-light type="omni" color="#ffcc99" range="10"></pc-light>
</pc-entity>
运行时向 <pc-entity> 追加组件标签,会立即添加对应组件。
没有封装的组件
在 React 和 Web Components 中,可通过代码向引擎实体添加没有封装的组件。
- React
- Web Components
编写一个组件,在挂载时为所在实体添加引擎组件,在卸载时移除。useParent() 返回外层 <Entity> 对应的引擎实体:
import { useEffect } from 'react';
import { Entity } from '@playcanvas/react';
import { useParent } from '@playcanvas/react/hooks';

function AudioListener() {
  const entity = useParent();

  useEffect(() => {
    entity.addComponent('audiolistener');
    return () => {
      // unmounting the whole entity has already destroyed its components
      if (entity.audiolistener) entity.removeComponent('audiolistener');
    };
  }, [entity]);

  return null;
}

<Entity name="camera">
  <AudioListener />
</Entity>
等待实体就绪,再为其添加组件:
<pc-entity name="logo"></pc-entity>

<script type="module">
    import { whenReady } from '@playcanvas/web-components';

    const logo = await whenReady('pc-entity[name="logo"]');
    logo.entity.addComponent('sprite', { type: 'simple' });
</script>
读取和修改属性
组件设置是可以随时读取和修改的属性,修改会立即生效。修改向量或颜色属性时,应为属性赋一个新值。
- 引擎
- 编辑器
- React
- Web Components
lamp.light.intensity = 2;
lamp.light.color = new pc.Color(1, 0, 0);

console.log(lamp.light.range); // 10
在 Inspector 的组件面板中编辑字段。场景运行时,修改会同步到运行中的应用,方便边观察边调整。右键点击字段可复制其值,并粘贴到同类型字段中。
运行时可从脚本设置属性,例如 this.entity.light.intensity = 2。
修改 prop,组件渲染时会更新对应的引擎组件属性:
function Lamp({ on }) {
  return (
    <Entity name="lamp">
      <Light type="omni" intensity={on ? 2 : 0} />
    </Entity>
  );
}
修改特性:
const light = document.querySelector('pc-entity[name="lamp"] > pc-light');
light.setAttribute('intensity', '2');
元素就绪后,其 component 属性指向引擎组件,可用于访问没有对应特性的属性。
禁用与移除组件
每个组件都有 enabled 属性。禁用后组件停止工作,例如渲染组件不再绘制,脚本组件停止运行脚本,但会保留设置,供重新启用。移除组件则会删除组件及其设置。禁用整个实体会同时禁用所有组件,参见启用与禁用。
- 引擎
- 编辑器
- React
- Web Components
box.render.enabled = false; // stop drawing the box
box.render.enabled = true;  // draw it again

box.removeComponent('render');
通过组件面板标题栏中的开关启用或禁用组件。齿轮菜单提供 Copy Component、向其他实体 Paste Component,以及 Remove Component。
停止渲染组件会将其移除。组件没有 enabled prop;若要禁用并保留设置,应通过指向实体的 ref 设置引擎组件的 enabled:
import { useEffect, useRef } from 'react';
import { Entity } from '@playcanvas/react';
import { Light, Render } from '@playcanvas/react/components';

function Box({ visible, lit }) {
  const ref = useRef(null);

  useEffect(() => {
    ref.current.render.enabled = visible;
  }, [visible]);

  return (
    <Entity ref={ref} name="box">
      <Render type="box" />
      {lit && <Light type="omni" />}
    </Entity>
  );
}
设置标签的 enabled 特性可禁用组件,移除标签则移除组件:
<pc-entity name="box">
    <pc-render type="box" enabled="false"></pc-render>
</pc-entity>
添加自定义行为
内置组件提供引擎支持的能力。其他功能,从打开门到游戏规则,都应通过脚本实现,再使用脚本组件附加到实体。一个脚本组件可运行任意数量的脚本,各脚本通过 this.entity 访问实体。下面的脚本让实体绕竖直轴旋转:
import { Script } from 'playcanvas';

export class Spin extends Script {
    static scriptName = 'spin';

    /**
     * How fast to spin, in degrees per second.
     *
     * @attribute
     */
    speed = 90;

    update(dt) {
        this.entity.rotate(0, this.speed * dt, 0);
    }
}
- 引擎
- 编辑器
- React
- Web Components
box.addComponent('script');
box.script.create(Spin, { properties: { speed: 45 } });
将脚本保存为 spin.mjs 等资源,为实体添加 Script 组件,并从 Add Script 列表中选择 spin。随后 Inspector 会显示 speed 属性字段。参见管理脚本。
除 script 之外的 props 会赋给脚本实例:
import { Script } from '@playcanvas/react/components';

<Entity name="box">
  <Render type="box" />
  <Script script={Spin} speed={45} />
</Entity>
以脚本名称将其注册到应用,再在 <pc-script> 内使用 <pc-script-instance> 添加:
<pc-entity name="box">
    <pc-render type="box"></pc-render>
    <pc-script>
        <pc-script-instance name="spin" attributes='{"speed": 45}'></pc-script-instance>
    </pc-script>
</pc-entity>

<script type="module">
    import { registerScript } from 'playcanvas';
    import { whenReady } from '@playcanvas/web-components';
    import { Spin } from './spin.mjs';

    await whenReady('pc-app');
    registerScript(Spin, 'spin');
</script>
组件系统
每种组件类型在应用中都有一个组件系统,负责创建该类型的所有组件、逐帧更新及销毁。系统位于 app.systems,名称与组件相同;部分系统还保存所有该类型组件共享的设置:
// the gravity that pulls on every rigid body
app.systems.rigidbody.gravity = new pc.Vec3(0, -1.62, 0);
应用只能添加已注册系统所对应的组件。pc.Application 注册全部内置系统,Editor、React 和 Web Components 也是如此。pc.AppBase 仅注册明确列出的系统,让打包工具可以排除其余部分:
const options = new pc.AppOptions();
options.graphicsDevice = device;
options.componentSystems = [
    pc.RenderComponentSystem,
    pc.CameraComponentSystem,
    pc.LightComponentSystem,
    pc.ScriptComponentSystem
];

const app = new pc.AppBase(canvas);
app.init(options);
其余配置见独立使用引擎。
另请参阅
- 实体:创建、启用、销毁和复制组件所在的实体。
- 脚本编程:编写脚本,了解生命周期和属性。
- 检查器面板:在编辑器中修改组件。
- PlayCanvas React 和 Web Components:React 组件与 Web Components 标签。
- Component 和 ComponentSystem:引擎 API 参考。